All about projects |
  
|
All about projects |
|
Click on a "New Project" button or use the shortcut Ctrl + N to create a new project in your project manager.
|
Intelligent |
|---|---|
Make sure you read the chapter "Intelligent Quick entry" in regards to creating new projects. |
|
![]()

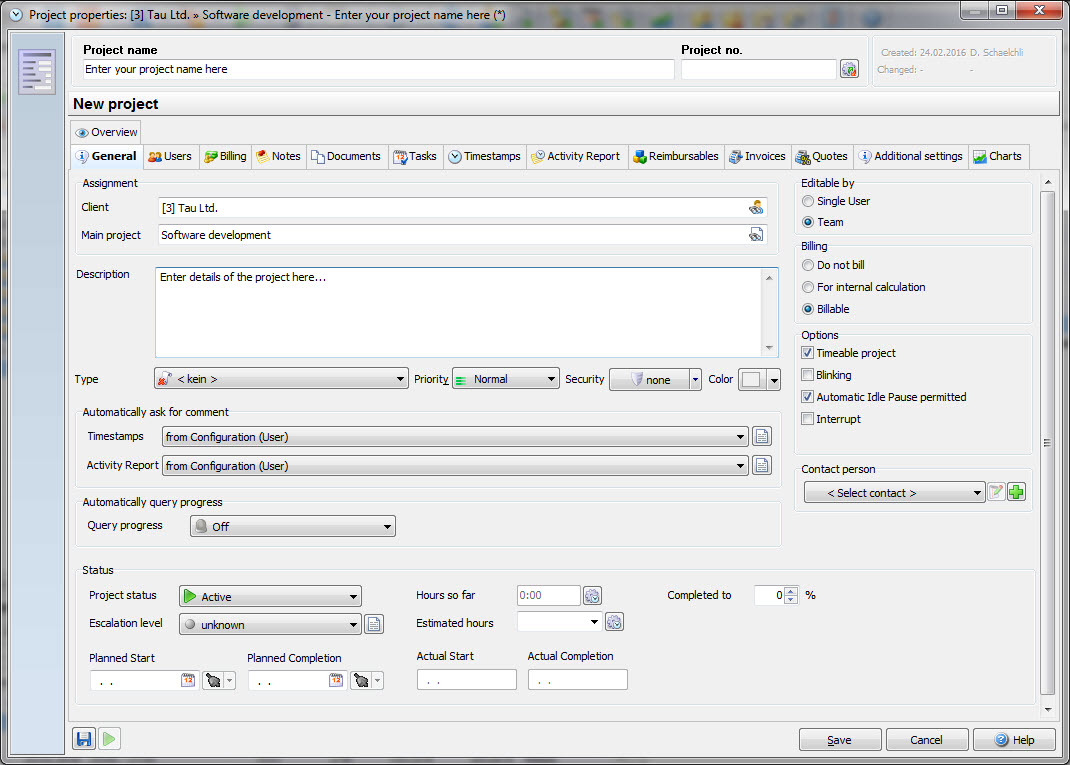
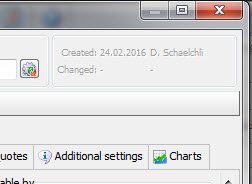
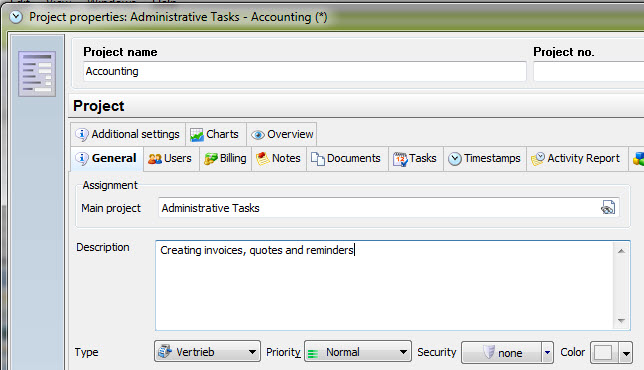
In the upper right corner of your project settings you find the name of the creator and the name of the user who changed the details last.
Details about the fields in the dialog:
Project name |
Use any name you want for your project. If you only want to create a main project, you'll only see the option to create a main project. If you click with your mouse on a main project and then hit the button to create a new one, you'll see the main project in your dialog as well. You could delete this main project in order to create a new main project instead. |
Project number |
Enter project number for your reference. The project numbers are not created automatically and they must be numbers in order to sort them. |
Main work group |
If you've set the work group mode in XTAdmin (multiple work groups per user) you have to choose the main work group for the project. All created sub projects will then automatically be assigned to this work group. |
Description |
A brief description of the project. |
Project type |
In order to filter your projects later, choose a project type. |
Priority |
You can sort your projects by priority in your project manager. Make sure you enter the data here in order to use this filter effectively. |
Security level |
Each project can be assigned a project level. A user with a lower security level than the project will not see the project in the list. |
Color |
Assign a color to your projects. They will be colorized in your project manager. This way you can identify certain projects visually easier. |
Project state |
Choose between different project states. Make sure you use them, otherwise the project list in your project manager will get too long. You can filter for "Active" projects in your project manager to display only the projects you are currently working on. |
Completed to |
This estimated, percent entry must be entered manually. You'd have to guess the completion of your project and enter the percentage. |
Used time |
This is the percentage of used time. Calculated on your entered estimated hours. |
Hours so far |
This is the total time stopped on the project so far. |
Planned start / planned completion |
Enter the estimated start and finish date for your reference. |
Estimated hours |
Estimated duration of the project, shown in hours. If you do so, the time left for the project can be displayed as a countdown on the timebar. |
Escalation level |
If problems occur with the project you can set the escalation level to inform your colleagues about problems. Use the escalation level as a filter in your project manager to identify projects with problems. |
Contact person |
Assign one contact person per project. This person receives the automatic email reports. It's just an information setting. There's no further function behind this field in the software. |
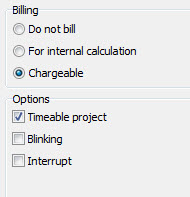
Billing |
Not chargeable: You work on a project you cannot bill to a client, nor include it in the calculation for the project. These might be your smoking breaks or private telephone calls. Internal calculation: You work on a project that should be included in the internal time summary but cannot be billed to a customer. This could for example be "Guarantee work" or Support for software. The price for the project will appear as zero, but the internal price will still be calculated. Chargeable: These are the projects that are included in the summary of time for the client and the calculation for the project. |
Options |
Timeable project - Is this box checked you can stop time on the project. Please note, that a main project should never be a "timeable project" as the time sum of the sub projects should add up to the sum of the main project. Now if you book time on the main project, this sum doesn't add up to the correct sum any more. Therefore please try to avoid adding time on your main project. |
Interrupt |
If you get interrupted in your work flow very often, you can set an interrupt project. This way you can use it every time you get interrupted, and when you hit "Stop" on the project, the timer will automatically jump back to the previous project you've worked on. (the one you got interrupted from). |
Description |
Enter all necessary information to the project you want your team to see. If you run the mouse over the project name in the project manager, this information will be displayed. |
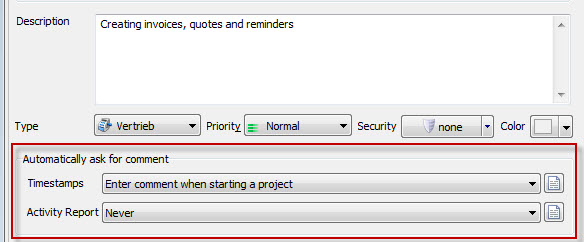
Automatically ask for comment |
You can have Xpert-Timer ask you to enter a timestamp comment on different occasions. For example, when you start a project, or when you stop a project. Have a look at the drop down box, to find out the different options. You can also set a standard text for your comment. |
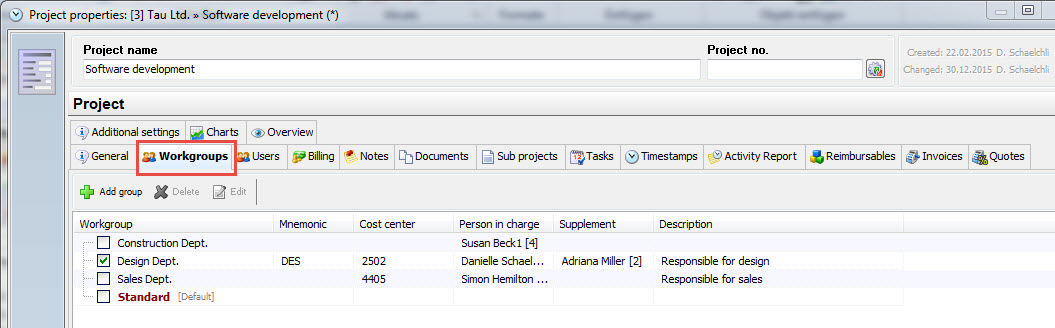
In the tab "Workgroups" you can assign a workgroup to the project. Only the users of those workgroups will be able to see the project (if again the project is assigned to the user). You can assign multiple work groups to one project if you've set the mode to "Multiple work groups per user", but you can only assign one single workgroup if the mode is set to "Only one workgroup per user".
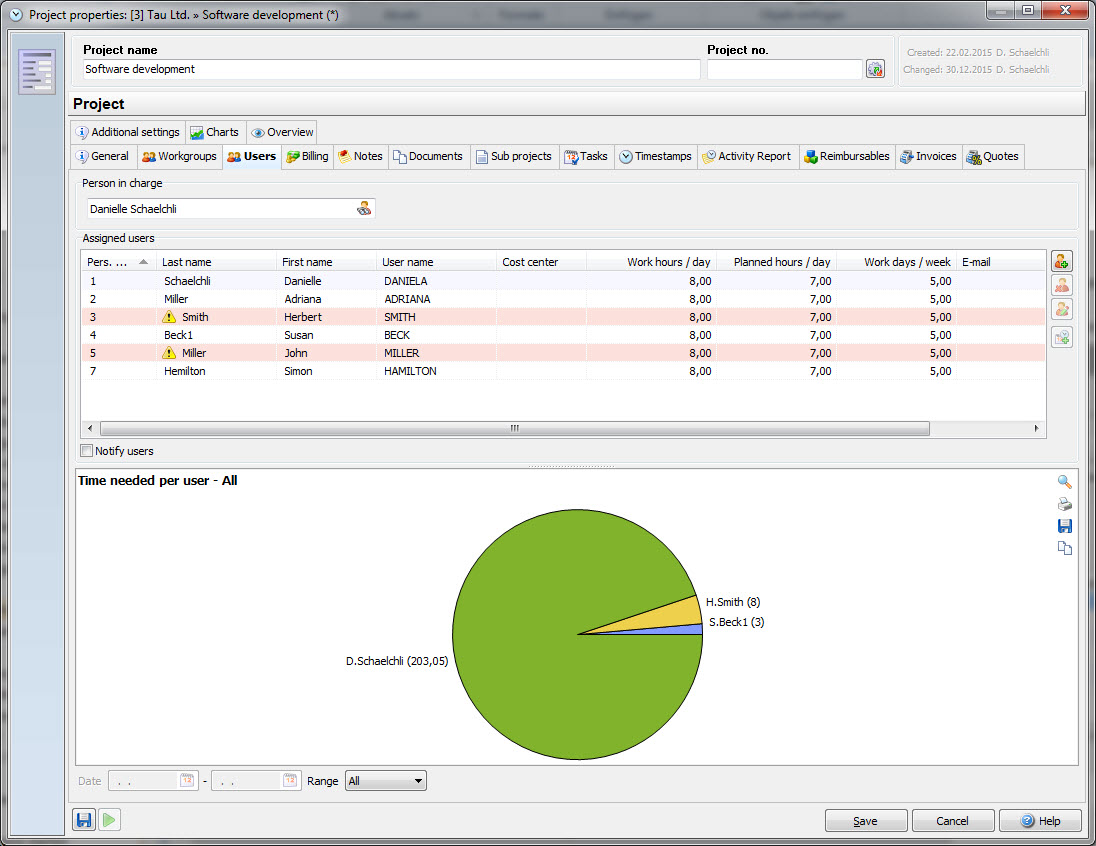
Point to the tab "Users" to find out, what co-workers are assigned to the project. In this tab you can also assign new co-workers to the project. You can do this also in the dialog "Assign projects".
Users with an exclamation mark besides their name use an older version of Xpert-Timer than the currently available. You should have them install the newest version of Xpert-Timer.
Use the option "Notify users", so they will see a popup windows on the desktop as soon as they are assigned to a new project.
The graphic shows all assigned users and the total time they've worked on the project so far.
Billing
You can assign a specific price to every user as well asevery project. As soon as you create a billable project the "Billing" tab will be visible. Enter a flat rate or a price per hour. The price in your timestamp listed will be calculated based upon these entries.
You can choose between different charge rates. The individual billing rate is specifically for this project. The Billing rate from main project is set in the settings of your main projects or you can use the hourly rate you entered in the user settings for the Billing rate from user settings.
The Profit / Loss is calculated as follows:
Total profit = Created timestamps x Price per unit
Total cost = Created timestamps x Cost from user settings
Win/Loss Reimbursables = Receivables - Payables in the reimbursables
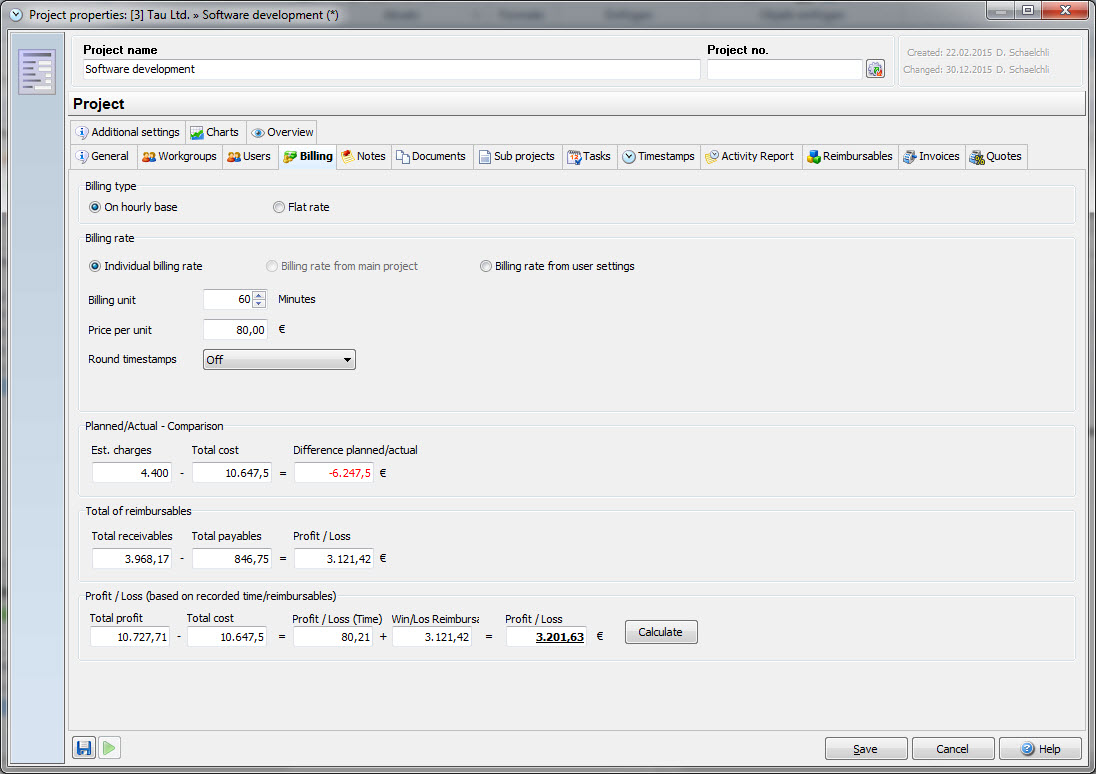
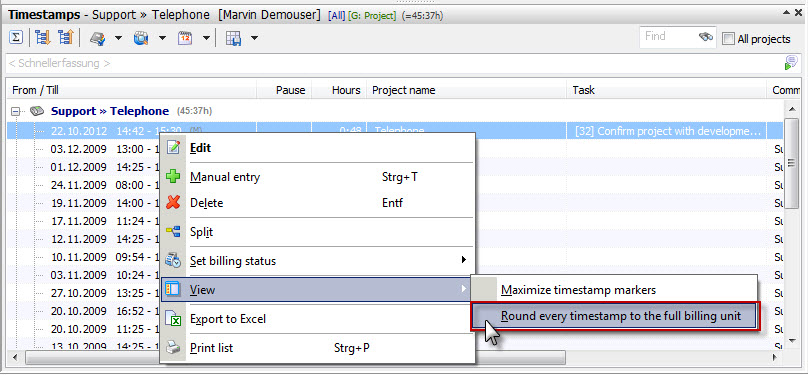
In case you want to round your timestamps to the full billing unit when stopping the time, you can turn the function "Round timestamps" on. Note, that all timestamps will be set to the full billing unit. In case you only need to round the timestamps for reporting purposes, you should do this in the timestamp list instead. This way you can keep your original timed minutes, but you can print the rounded timestamps for your client report. All rounded timestamps are marked with an (R) in your timestamp list.
Notes
You can create notes for your projects. This could be e.g. login data of your clients, open questions, comments to the project and so on. Be creative!
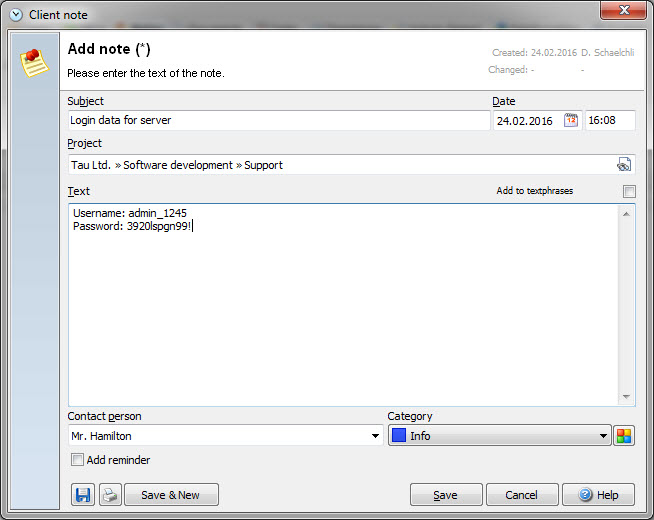
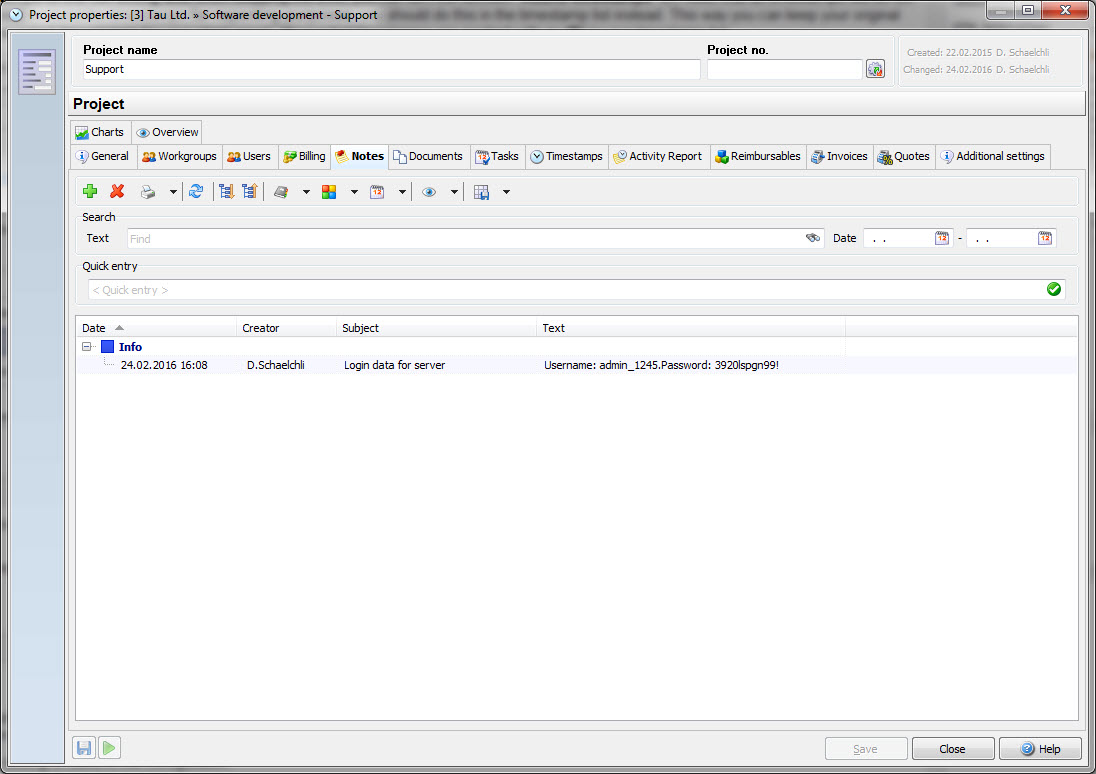
All your created notes will be listed in the tab "Notes" of your project settings. You can categorize your notes and group them. There's also a filter for the date range and the category.
Documents
The tab "Documents" displays all documents linked to this project. Here you can group, filter and again save your view for the documents. Please read the chapter "Document management" for further details.
In order to add documents, you can simply drag&drop them on this dialog.
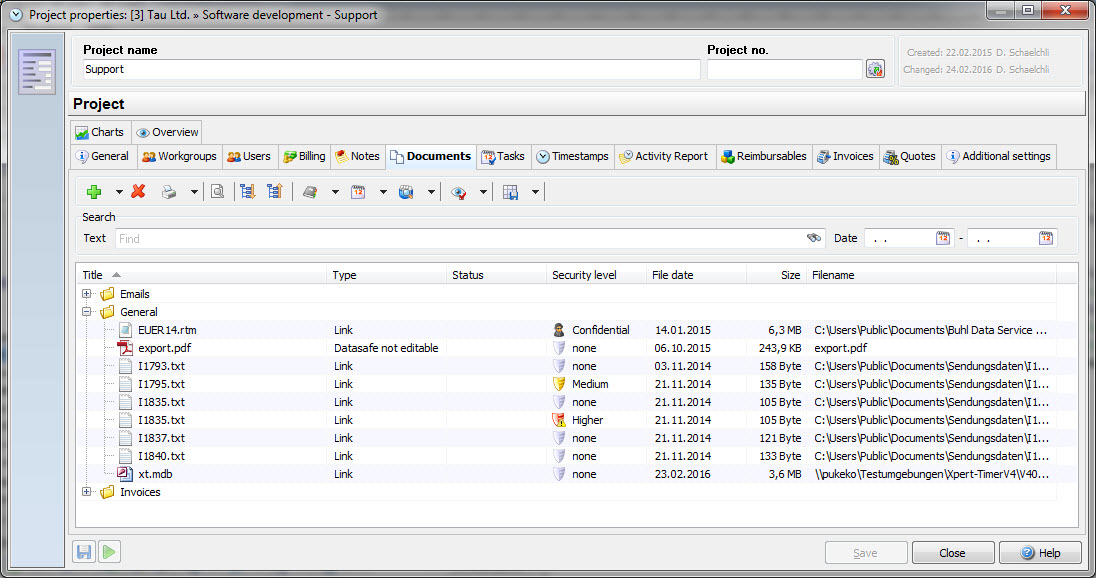
If you right click on a document you have multiple option. If you want to create a new directory, then note, that it will not be listed until you assign a document to it.

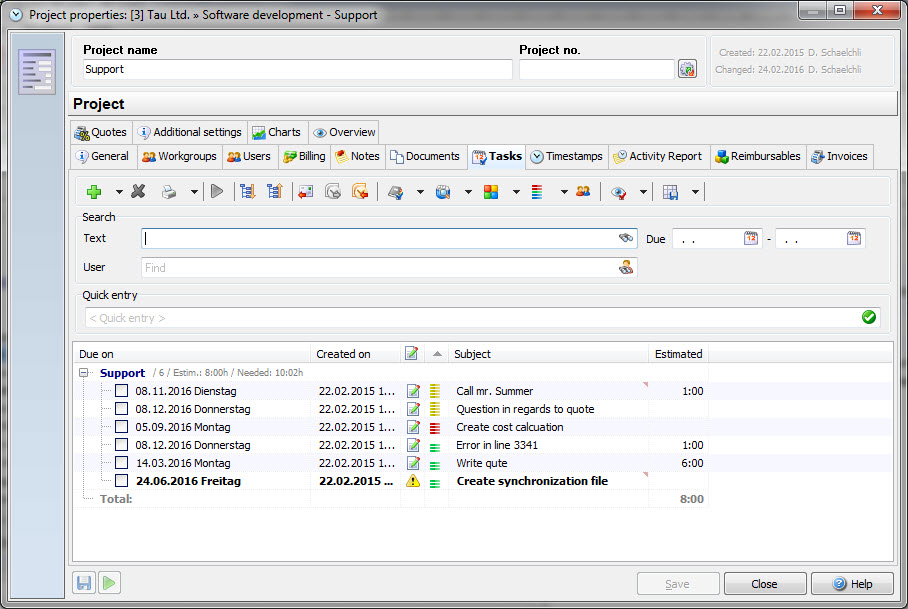
In this tab you see all to-do items listed. You can sort them by clicking on the column header. Again, if you right click you get the context menu to print the tasks.
To add new tasks, click on ![]() or delete tasks using
or delete tasks using ![]() . Please find many more details in regards to To-Dos in the chapter "To-Do List".
. Please find many more details in regards to To-Dos in the chapter "To-Do List".
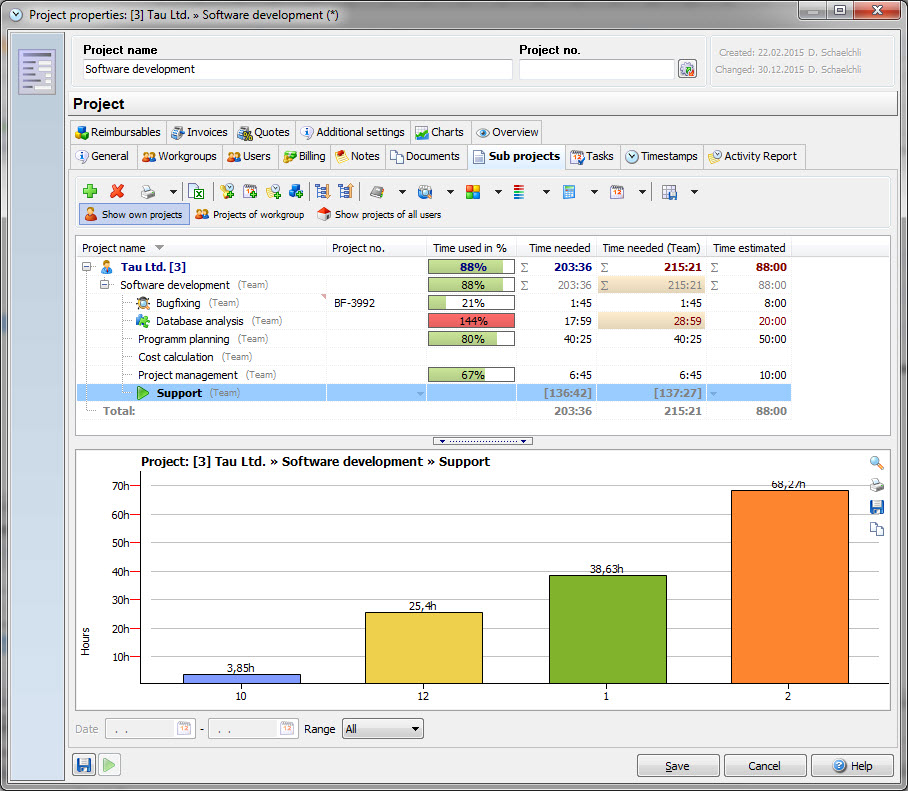
In the tab "Sub projects" you find a list of all sub projects of the main project, as well as the time used per month. Use the right mouse button in order to add new projects or edit existing ones. If you click on the column headers, you can show additional columns or hide them.
You can show or hide the graphic. The setting can be found in the configuration.
The timestamp tab shows you the times you have worked on the project. If a time has been entered manually it will be marked with a "M". Click again on the column header to display more columns. If you right click on the timestamps you can group then by certain criteria, and print them.
Timestamps that have been billed are marked green. To set the timestamp mode, right click on a time stamp.

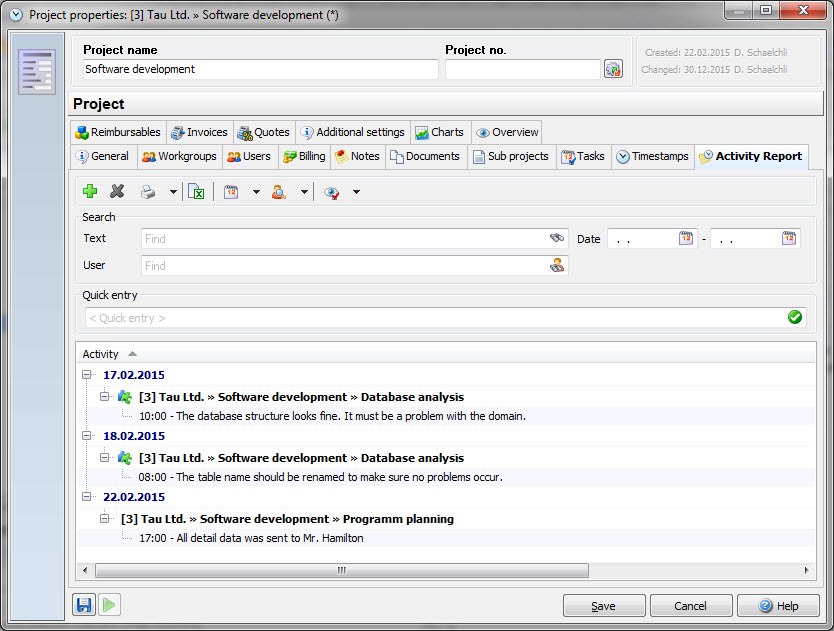
In the menu item "Activity report" you can document general information about the project without creating a timestamp. Most users use the activity report for information their client should not see.
You can sort the entries by date if you click on the header "Activity".
Here you can also add a new entry by clicking on: ![]() .
.
Reimbursable expenses
All reimbursables you have entered during the runtime of a project are listed here. Please find further details in the chapter "Reimbursable ledger"

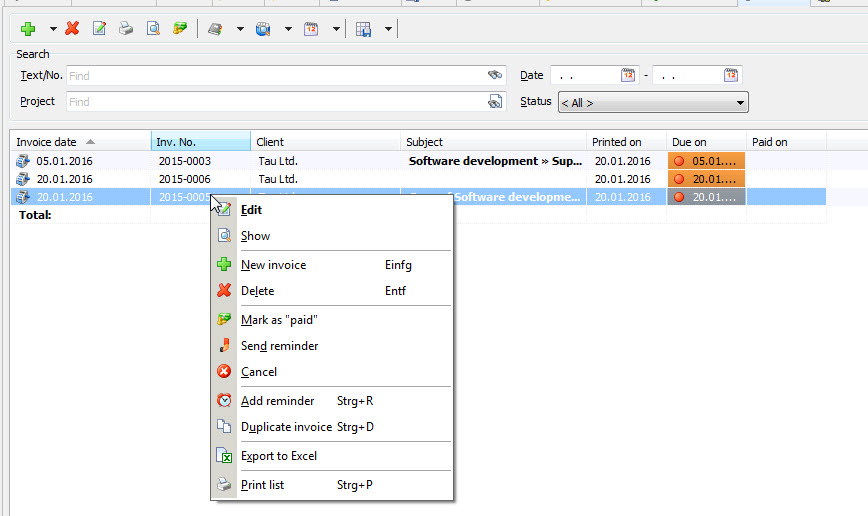
Invoices
A list of all created quotes with this project is listed in the project settings.
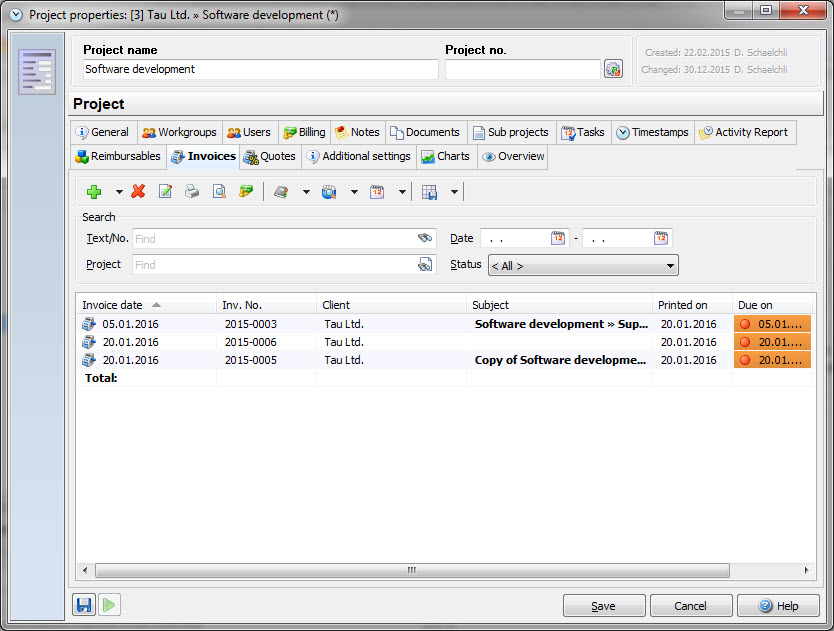
Additional functions are available if you right-click on an entry:
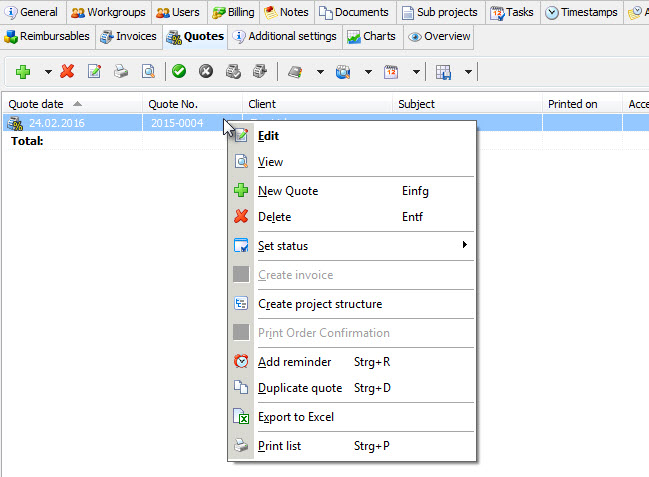
Quotes
Also all quotes are listed in the project settings.
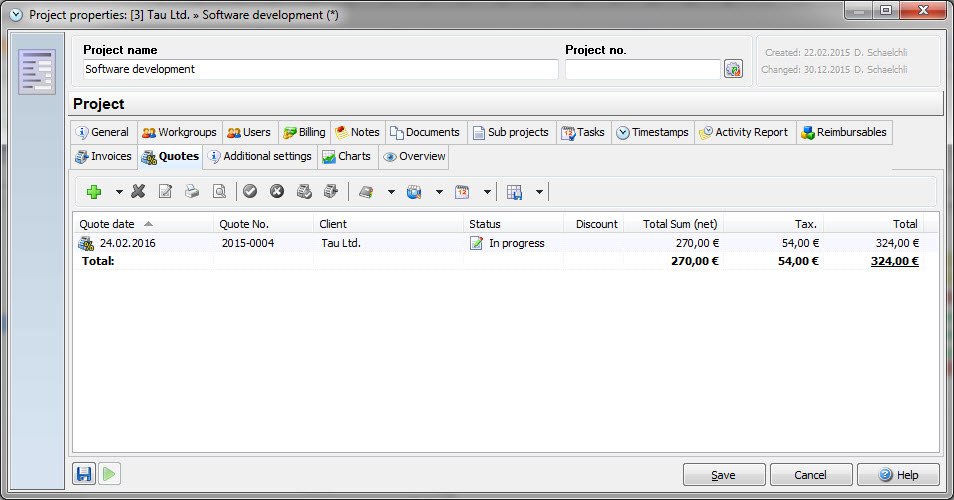
If you right click on an entry you get a lot of additional functions to choose from. You can for example create a project structure from your quote. If you use the function, your quote items will be added to your project manager. From there you can drag&drop the projects into the order you need.
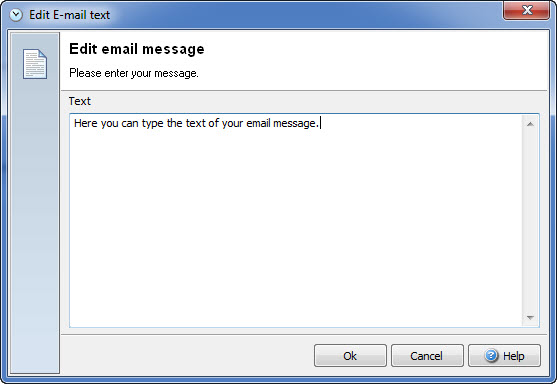
Xpert-Timer lets you send reports through e-mail automatically in 3 situations. On progress change, on status change and through the quick status. Click on the button "Edit email text" in order to change the standard text in your e-mails.

Before you send the email, you'll have a chance to edit the text again.
In Xpert-Timer there are 10 available user defined fields in the project settings. Those fields get exported if you export the projects to Excel. Besides that, they are only for your information. If you use the XTAPI to access the database and to create your own reports, you can access those user defined fields as well.

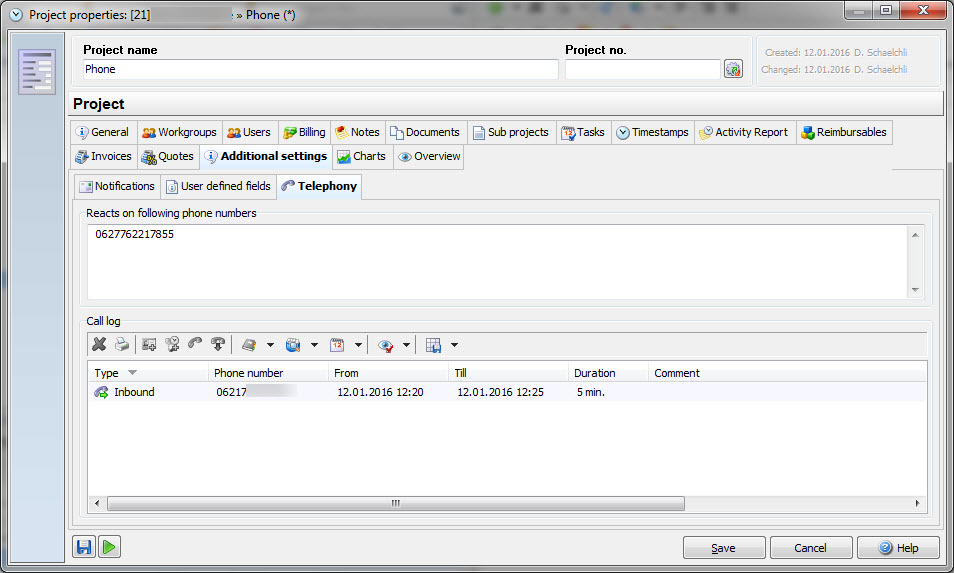
Usually you are setting the phone project in the client settings, so each client has one telephone project. If you have a client that has multiple telephone numbers and you need to start a project for each phone number, you can enter those phone numbers in the Telephony tab in your project settings.
Here you see a graphical display of the hours you spent on the project per month. In the drop down field you can choose between displaying the time used per month or the graphical project progression in %.
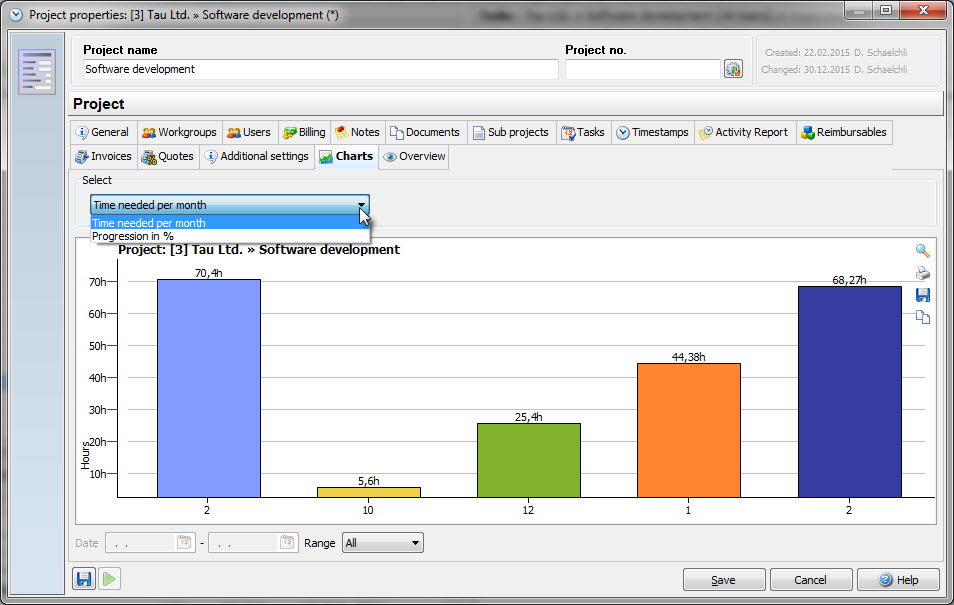
If you right-click on the chart you can print it, copy it to the clipboard to mail it to someone or save it.
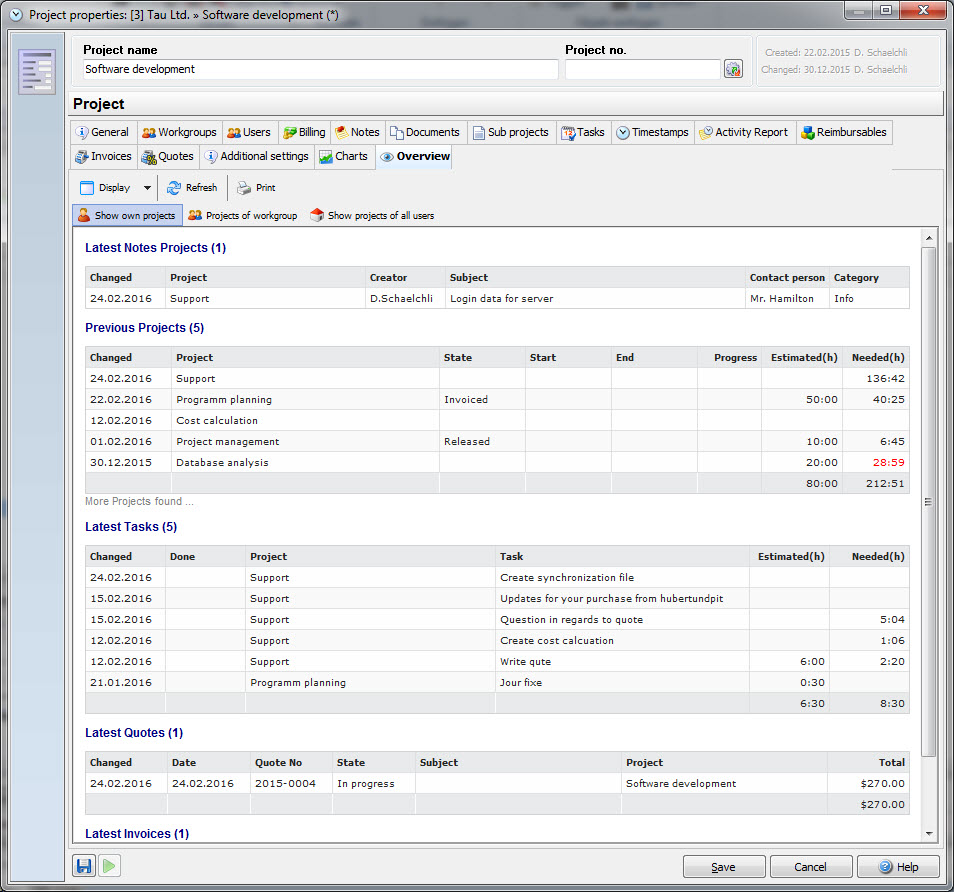
Overview
The overview displays all current actions to the project. If you use the button "Display" you can decide what objects are displayed.